


Painting stained glass for the stage is always high on a scenic artist’s wish list of projects. Not only can they be very pretty, but they also give us a chance to flex our problem-solving muscles. The first problem to solve is what substrate the window will be made from. Often, the two main options are muslin or clear plexiglass; and each of these presents their own set of challenges to meet. Scenic Artist Rachel Reynolds chose to go with the clear plexi option to create a stunning piece of stained glass scenic art for Long Wharf Theatre’s production of Napoli, Brooklyn by Eugene Lee.
 Once one has chosen to go the plexi route, the next two challenges to meet are how to recreate the leading effect and what products to use to create the translucent, colored-glass effect of stained glass. For both of these effects, Rachel used Rosco’s CrystalGel as the base in her recipes and technique.
The key to this specific window was the contrast in leading sizes from super thick and dimensional to thinner, more delicate lines that broke up the pattern. Creating different sized leading meant having a trio of recipes and application methods. Rachel created three different leading recipes: an extra-thick “Piped Leading,” a “Thin Grey Leading” and a thinned out “Liquid Leading” - each of which had a shared base of CrystalGel, Velour Black Supersaturated Scenic Paint, as well as Graphite Powder for that sexy lead luster effect.
Rachel added painter’s caulk into the thick “Piped Leading” recipe to really give it some bulk. For the “Thinned Grey Leading” she used a mixture of clay powder, Rosco FlexBond and water for its thickener. The “Liquid Leading” recipe eliminated the thickeners altogether and added more water until it was a heavy cream consistency.
 Rachel Reynolds’ three recipes for stained glass window leading
After placing the layout drawing backward on the front of the plexi, Rachel then flipped it around and traced the pattern with different sized Sharpies on the back. This gave Rachel a great road map to follow once she flipped it back over to the front side and began creating the leading lines with her recipes.
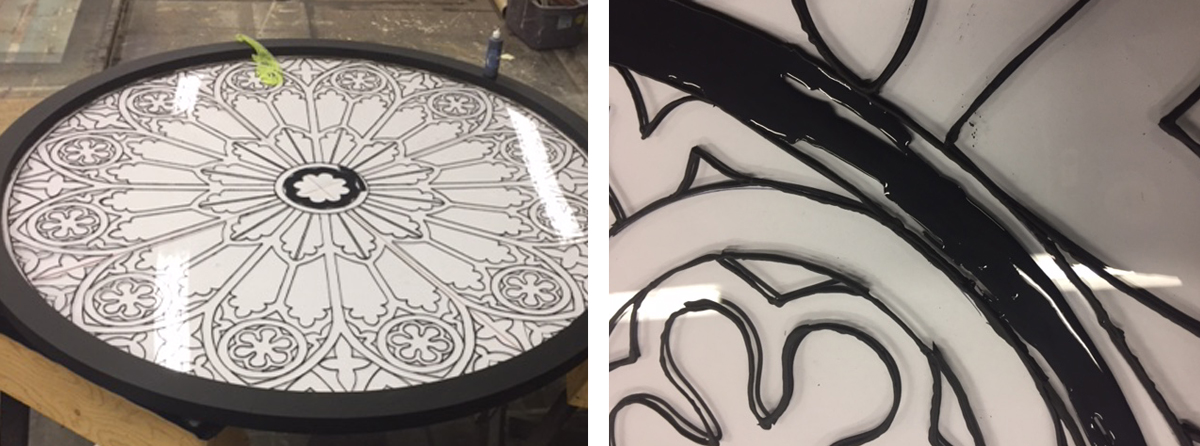 The full outline of the window’s leading pattern (L) closeup detail of the “Liquid Leading” (R)
The first round of leading was the “Thinned Grey Leading” that was applied to the plexi using a cake decorating squeeze bottle tool from Wilton. Rachel used this technique to follow the outlines of all the shapes she’d traced. From there, she used the “Liquid Leading” recipe to fill in the large areas and voids. It is important to let the leading mixtures dry slowly (overnight is best) to avoid cracks and bubbles.
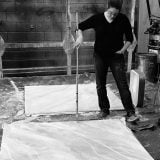
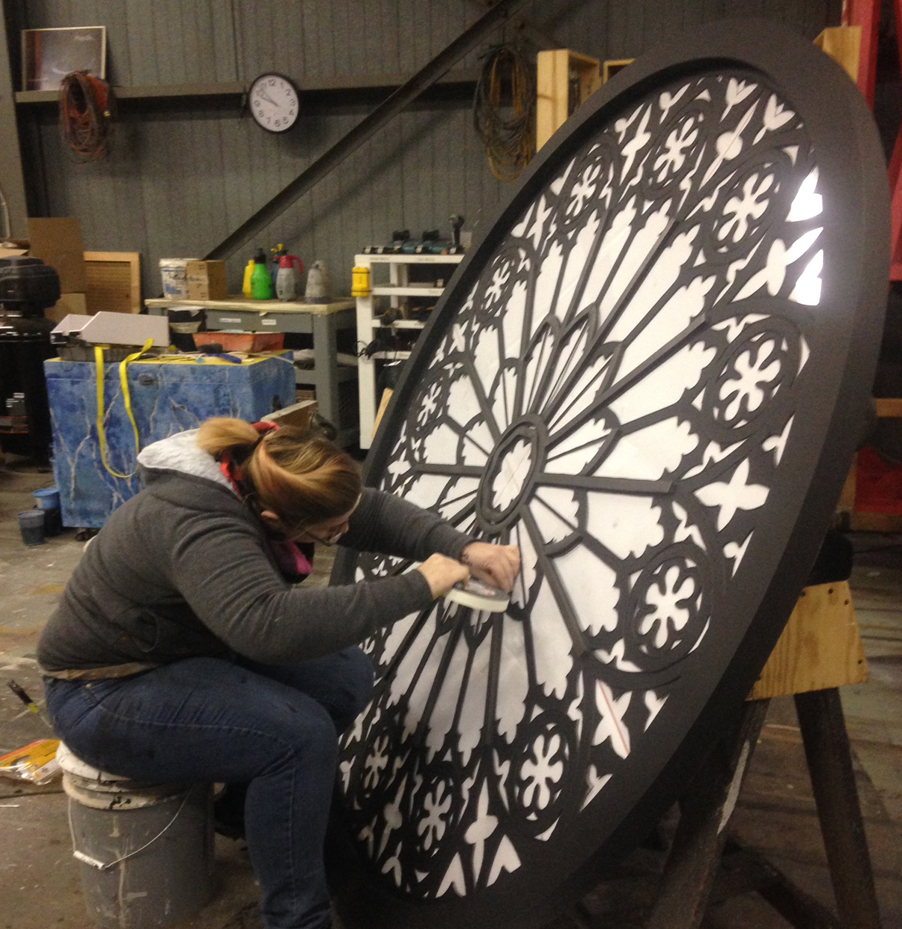 Scenic Artist Rachel Reynolds applying foam window insulation for greater depth
To create an extra layer of depth and detail to the window, foam window insulation strips were applied to the thickest leading sections. The foam strips were then coated with the “Piped Leading” recipe using the Wilton cake decorating tool to pipe it on and create details.
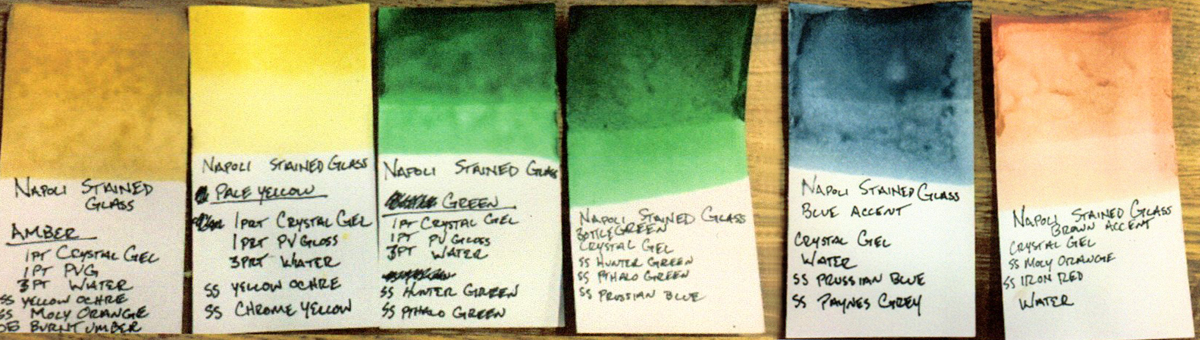 Rachel Reynolds’ recipes for translucent stained glass window colors
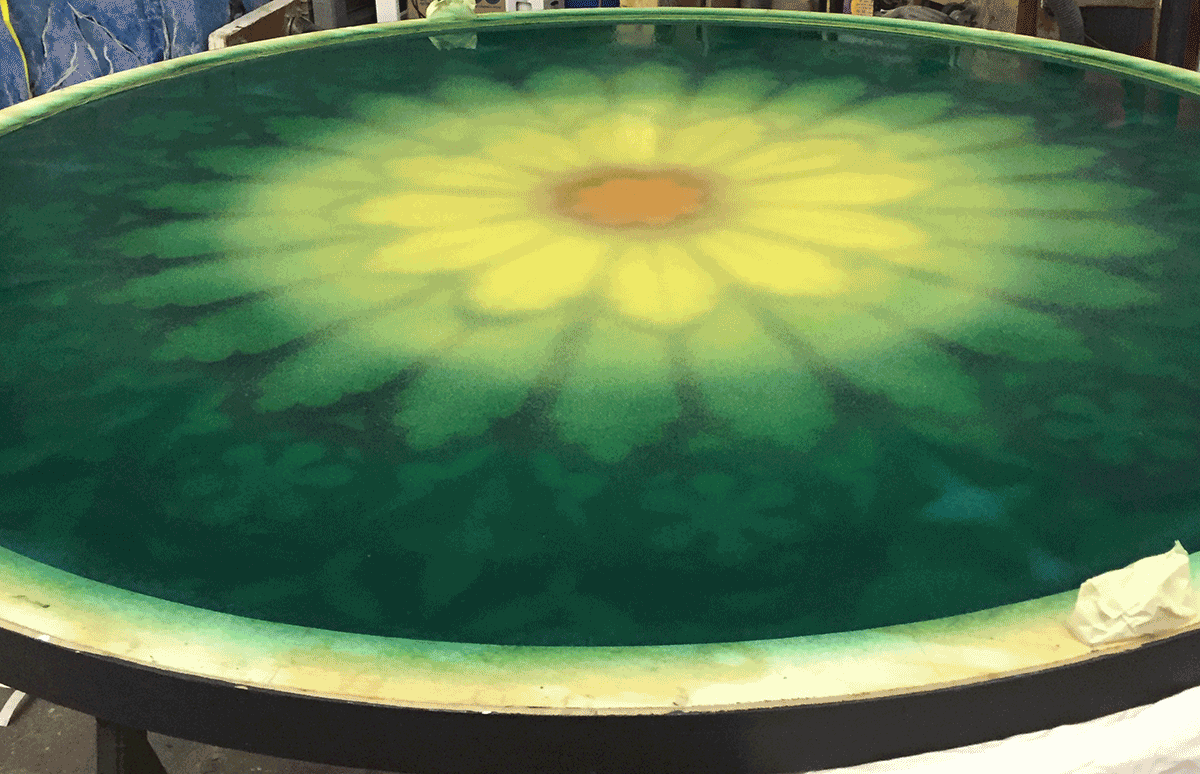
YAY!!!! The tedious leading steps have dried, and now we can move onto the fun part – THE COLOR!!! Not only is stained glass full of deep vibrant colors, it also needs to be translucent. Paint alone will just create an opaque surface. By using a mixture of CrystalGel and Plastic Varnish as the medium, and then slightly tinting that mixture with Rosco Super Saturated Paints – Rachel created a solution that solved both problems of color and translucency.
 Sampling at this stage is key, as one needs to get just the right amount of vibrant color without making it too opaque. Testing different methods and tools of application are very important because each tool or technique can create different textures or patterns in the glass.
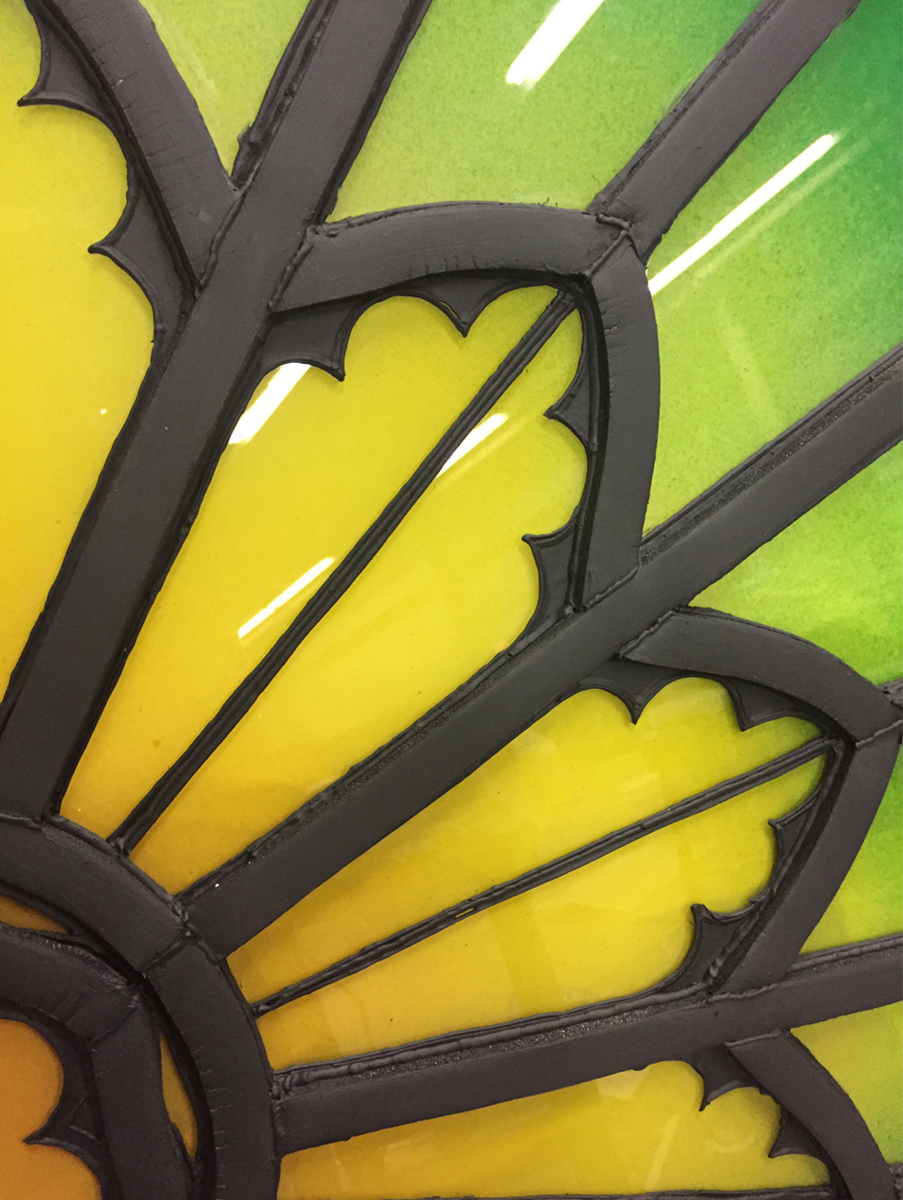
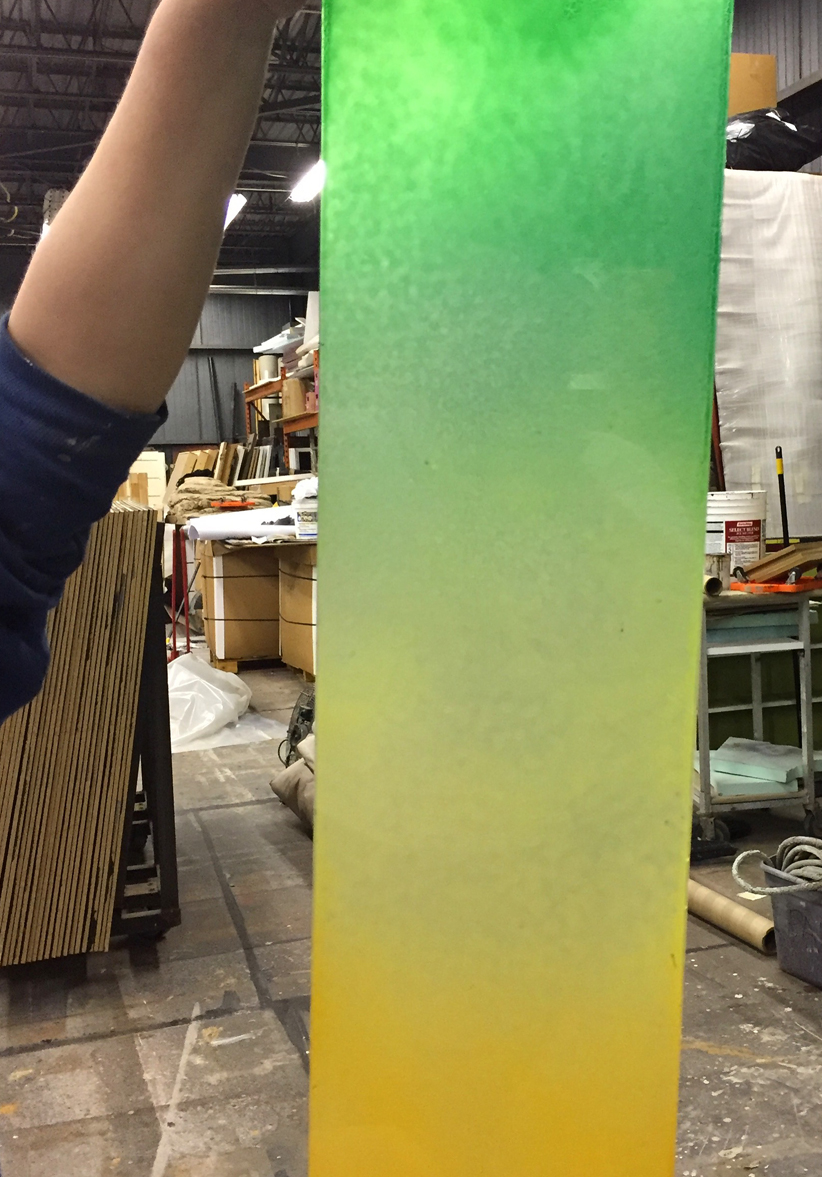
Because the overall design called for a very subtle and soft ombre blend of colors, Rachel wisely chose to paint on the back of the plexiglass.
Before painting, Rachel cleaned the backside with Denatured Alcohol to remove her sharpie lines. From there, she used a Preval sprayer to apply a thin coat of one-part CrystalGel and four-parts water to act as a primer for the other colors. CrystalGel sticks to plexiglass wonderfully, while paint does not. This CrystalGel primer gave the paint mixture a better surface to stick to.
Rachel put the Preval sprayer back to work as she applied her CrystalGel/Varnish/Supersat mixtures onto the backside of the Plexi. She started with a graduated blend of the amber, yellow and the greens, then finished with a layer of the brown and blue for added contrast.
 Before handing the window back to the carpenters to install, Rachel did a final clean-up on the front with alcohol and Q-tips to finish off her stunning piece of stained glass window scenic art.

Angelique Powers May 18, 2017 Questions?
Guest Author Angelique Powers has an MFA in Scenic Art Design from the California Institute of the Arts and has been professionally painting theatrical scenery for over 16 years. A Founding Member of The Guild of Scenic Artists, Angelique also shares her knowledge, passion and experience with her students at the University of Minnesota as a scenic paint instructor. To see Angelique’s work, be sure to explore the portfolio on her website – Qpowers.com.